Työpaikat (perus): Lisää manuaalisesti tai automaattisesti
Jokainen työ on yksittäinen palvelu, josta asiakas maksaa. Työ menee putkistoon, joka on suunniteltu nimenomaan sen tarvitsemaa palvelua varten. Kun putki on luotu, voit lisätä siihen töitä.
Katettu täällä:
- Mitä pitää muistaa työpaikkoja lisätessä
- Lisää työpaikkoja manuaalisesti
- Automaattinen työpaikkojen lisääminen asiakkaan rekisteröintilomakkeen kautta
- Automaattinen työtehtävien lisääminen putkiston aikataulun avulla

Webinaari - Työnkulun automatisointi: Optimoi sisäiset prosessisi! Tiistai, 13.00 EST. Rekisteröidy täällä
Mitä pitää muistaa työpaikkoja lisätessä
Pidä mielessä:
- Yrityksen omistaja, ylläpitäjä tai kuka tahansa työntekijä, jolle on annettu käyttöoikeudet seuraaviin asioihin hallita putkistoja, lisää töitä putkistoon.
- New jobs can be added to any stage of a pipeline.
- Työpaikkoja voidaan lisätä sekä aktiivisille että offline-tileille; kuitenkin vain käyttäjät, joilla on aktiivinen tili ja ilmoitukset päällä, saavat sähköpostiviestejä, jotka lähetetään putkiautomaation kautta.
- Voit käyttää mukautettuja malleja säästääksesi aikaa töiden luomiseen.
- Työntekijät näkevät vain heidän käyttöönsä asetetut putket.
- Työntekijät voivat siirtää heille osoitettujen tilien töitä putkistojen kautta.
- Työntekijät näkevät vain heille osoitettujen tilien työt, ellei heillä ole käyttöoikeuksia tarkastella kaikkia tilejä.
Lisää työpaikkoja manuaalisesti
Voit lisätä töitä putkistoon valitsemalla sinulle parhaiten sopivan tavan:
- Siirry vasemmanpuoleisen valikkorivin kohtaan Työnkulku > Putket, valitse putki ja napsauta sitten Lisää työ.
- Napsauta vasemmalla ylhäällä NEW (UUSI ) ja valitse sitten Job (Työ ) ulosvedettävästä valikosta.
- Siirry vasemmanpuoleisen valikkorivin kohtaan Asiakkaat > Tilit , valitse valintaruudut niiden tilien vieressä, joita työ koskee, ja napsauta sitten Lisää työ.
- Napsauta + Luo uusi työ, kun linkität työn asiakirjojen lataussivulta, ja napsauta Päivitä työlista, kun työ on luotu.

Alla on lisätietoja numeroiduista jaksoista:
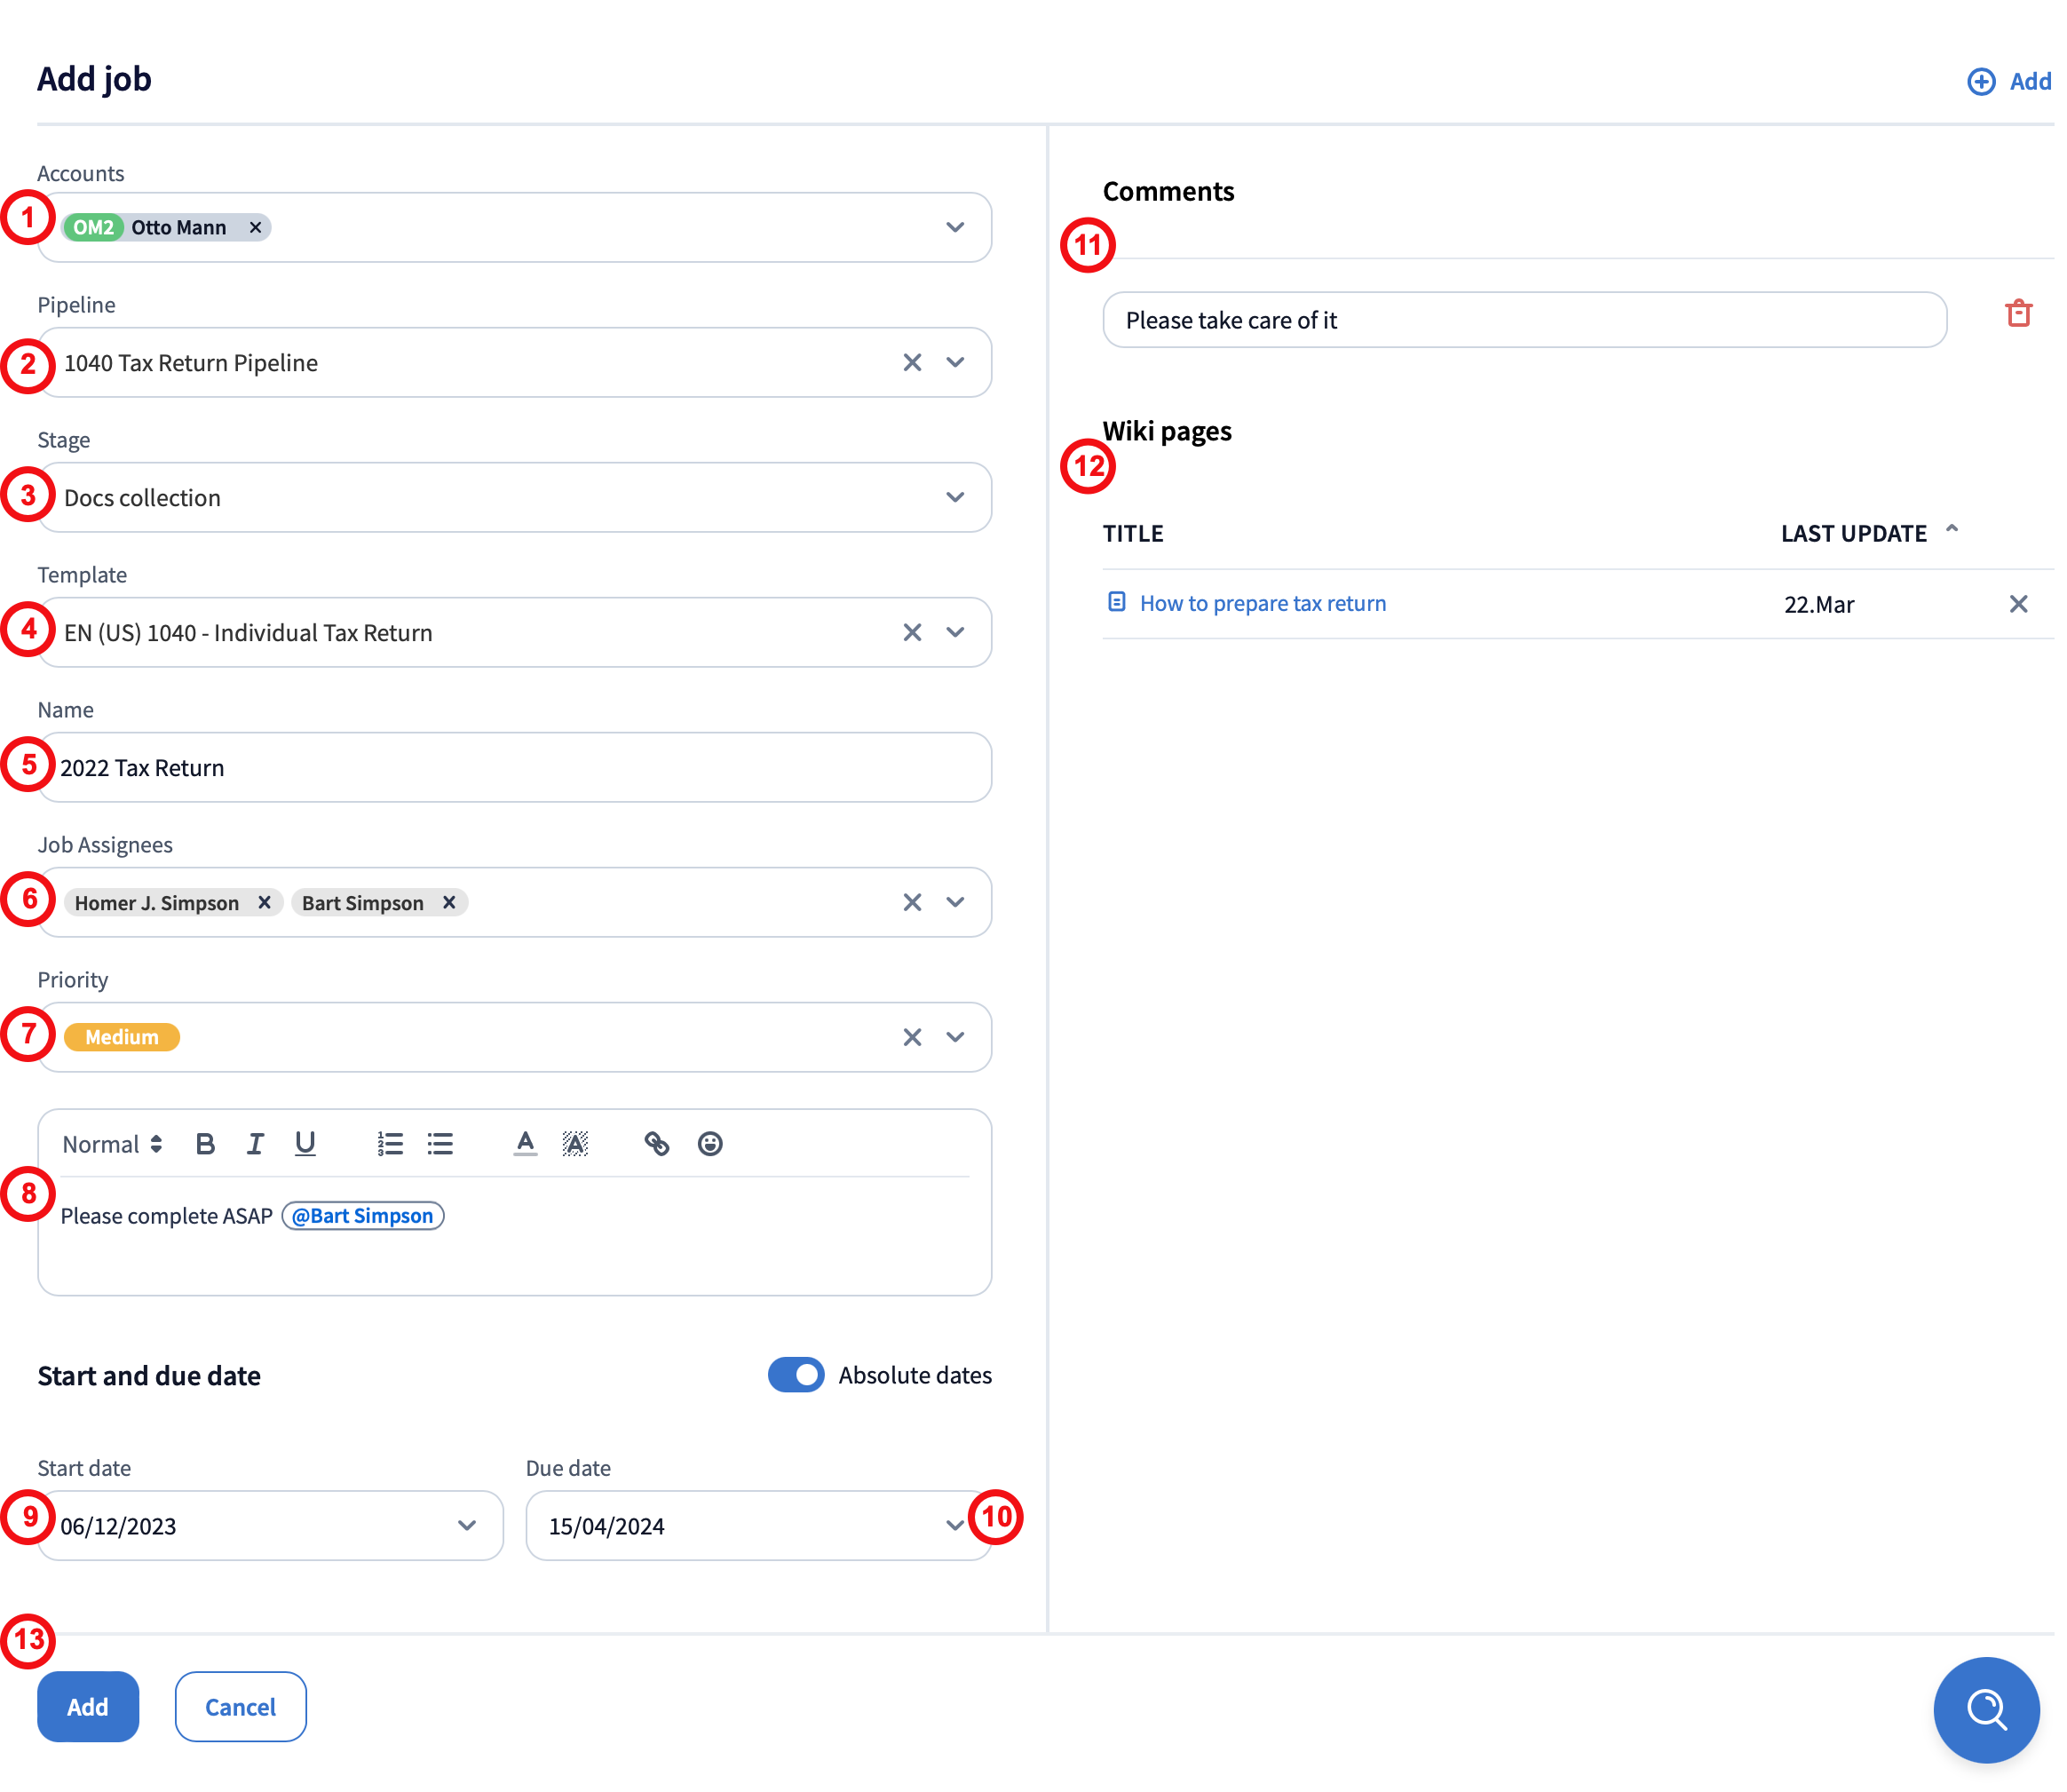
1. Accounts: Add or remove the names of accounts here. The job always performed for a specific account, so you need to select at least one from the list.
2. Pipeline: Select the pipeline for the jobs. (If you’re adding jobs from the pipeline itself, you can skip this)
3. Stage: Select the initial stage for the job in the pipeline. By default, the first stage is selected.
4. Template: To quickly create jobs, select a template with a custom job name, dynamic data (fields that automatically get filled in, such as with the date and account name), description, due date, comments, and so on. For more details about job templates, go here.
5. Name: This is the name that is displayed on the job cards in a pipeline.
6. Assignees: Select the employees for jobs. To learn more about assigning jobs, go here.
7. Priority: Choose the priority level for jobs: Low, High, Medium, or Urgent.
8. Description: Use different text formatting, emojis, bullets, numbered lists, and even links here.
9, 10. Start Date, Due date: This is the date when the job has to be finished. Setting dates is optional but can be a helpful time-management tool. You’ll be able to identify which jobs are overdue by the exclamation mark icon next to their names in the jobs list.
11. Add a comment: Click the Add button on the top right to leave any useful notes here; for example, something your team members might need to know in order to do jobs.
12. Add a wiki page: If you have internal instructions for this kind of job, click the Add button on the top right to link them to the template for your team members.
13. Add: Click to add job(s) to a pipeline. If adding multiple jobs isn’t fully successful, you’ll get a notification explaining why in your Inbox+. Go here for more details.